Here we show you how to set up a Linux KVM bridge set to (br0) for use in a KVM slave node using a cheap dedicated server. These settings are specific to our network configuration and won’t work with other providers. You should only ever use these settings on a clean OS install, never change these settings in a live environment. If you make a mistake you will need to reinstall the OS on your server before trying again. First2Host offers this guide as a complimentary service, we cannot help you in the setup of 3rd party software. If you need support, please contact the software developers of the hypervisor you are using or a systems administrator experienced in Linux KVM Bridge setups.
Before you start
- The IPv4 Gateway is always your server’s main IP address, but the final 3 digits are .254 so if your servers ip address is 167.114.225.255 then your Gateway will be 167.114.225.254
- Mac addresses for virtual containers will be needed on KVM slaves. Please contact support for these after you have an ip block to use for guest machines
- This guide is provided as a complementary service for our customers to use, we can not offer support for specific hypervisors , instead, you should contact the vendor for support. Because we use a custom network configuration customers of other hosting providers should not follow this guide. It will likely break your networking.
To set up a bridge your server will need the bridge-utils package to be installed. First check to see if the package is already installed.
rpm -q bridge-utilsIf you get a response, then the package is already installed on your server. If there is no output, then continue to install the package
yum install bridge-utilsBefore you set up the bridge in your dedicated server the /etc/sysconfig/network-scripts/ifcfg-eth0 file will look like this
DEVICE=eth0
BOOTPROTO=static
BROADCAST=192.168.2.1
HWADDR=00:22:0E:03:0C:E2
IPADDR=192.167.2.2
IPV6INIT=yes
IPV6_AUTOCONF=yes
NETMASK=255.255.255.255
NETWORK=102.100.152.152
ONBOOT=yes
Backup this file in case of any errors
cp /etc/sysconfig/network-scripts/ifcfg-eth0 /etc/sysconfig/network-scripts/backup-ifcfg-eth0Create a bridge file
nano -w /etc/sysconfig/network-scripts/ifcfg-br0So we copy the information from the /etc/sysconfig/network-scripts/ifcfg-eth0 file to the bridge file
DEVICE=br0
TYPE=Bridge
BOOTPROTO=static
IPADDR=SERVER-IP
NETMASK=255.255.255.0
ONBOOT=yes
IPV6INIT=yes
IPV6_AUTOCONF=no
IPV6_DEFROUTE=yes
IPV6ADDR="IPv6ADDRESS"
IPV6_DEFAULTGW=IPv6 Gateway
NETBOOT=no
#IPV6_FAILURE_FATAL=no
#GATEWAY=IPv4 Gateway
Copy the bridge file exactly as you see it above swapping the ip information with your ip details. Don’t remove any (#) or “ from the file just swap the information. Save and close the bridge file.
And next, in the /etc/sysconfig/network-scripts/ifcfg-eth0 file add the required bridge into this file and comment out (#) the information we have below. Make sure you leave DEVICE=eth0, BRIDGE=br0, ONBOOT=yes, NETBOOT=no, NM_CONTROLLED=”no” with no (#)
/etc/sysconfig/network-scripts/ifcfg-eth0DEVICE=eth0
BRIDGE=br0
ONBOOT=yes
NETBOOT=no
NM_CONTROLLED="no"Finally, restart the network, you may get disconnected but you should be able to reconnect assuming you followed this guide and used the exact settings and information we have.
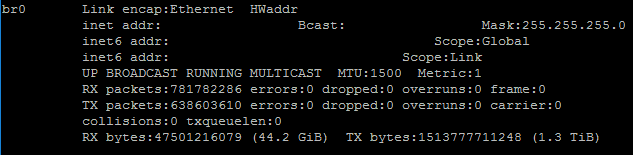
/etc/init.d/network restartYou can verify the bridge after restarting the network by
ifconfigYou should see the bridge br0 listed at the top