

Install and Configure CheckMK Linux Server Monitoring

CheckMK is an ultra-scalable server monitoring software designed for Sysadmins and DevOps. It ensures peak server performance by preventing preventable outages, late nights, or weekend emergencies. Checkmk can monitor various types of Linux VPS servers, including web servers, mail servers, and database servers. It offers more than 2,000 smart checks to track different metrics. The software provides an easy-to-use configuration, auto-discovery, and network mapping. Whether you’re using a Windows VPS Server, Linux VPS Server, or other operating systems, Checkmk has native agents to facilitate monitoring. Here we are going to Install CheckMK Linux Server Monitoring on an Ubuntu 22 VPS Server and then configure CheckMK to monitor various Linux Servers.
CheckMK Linux Server Monitoring Features
Checkmk supports both SNMP and TCP/UDP protocols for agentless monitoring. You can set up checks based on HTTP/XML, SSH, or TELNET or, CheckMK intelligently discovers which metrics to monitor on your server without requiring additional configuration. This speeds up the setup process, allowing you to go from zero to monitoring in less than 15 minutes.
Install CheckMK Server Monitoring on Ubuntu/Debian
We’re going to use CheckMM to monitor three Linux servers. First, we have installed an Ubuntu 22 VPS server and this is what will provide the console for CheckMK. To get started issue the commands below in your server.
wget https://download.checkmk.com/checkmk/Check_MK-pubkey.gpg

gpg --import Check_MK-pubkey.gpg

wget https://download.checkmk.com/checkmk/2.2.0p25/check-mk-raw-2.2.0p25_0.jammy_amd64.deb

apt install ./check-mk-raw-2.2.0p25_0.jammy_amd64.deb
These commands install CheckMK Linux Server Monitoring version 2.2.0. Ensure you download the latest version by checking here. So next we need to create a monitoring site. CheckMK allows you to create multiple sites that can monitor different infrastructures. Our monitoring site will be called HA_F2HCloud. You can name yours differently as required.
omd create HA_F2HCloud && omd start HA_F2HCloudOnce created and started, you can now access this via the IP address of the server. In our case, we would navigate to http://server-ip/HA_F2HCloud. The default admin user and password is displayed in the console. You can change the default password by accessing the monitoring site from the command line.
omd su HA_F2HCloud && cmk-passwd cmkadminConfigure Domain & SSL Certificate
It’s much nicer and easier to use a domain to access applications, right? So next we will install Certbot and request an SSL for our installation. When you install CheckMK, Apache is installed by default. To get a certificate, stop Apache first. We are using the subdomain echo.f2hcloud.com for our CheckMK install. Modify the one-shot code below for the domain you wish to use. Ensure the domain or subdomain is resolving to the server and you have the correct A records in place first.
systemctl stop apache2 && apt install certbot -y && certbot certonly -d echo.f2hcloud.comIn the console, the location of your SSL Certificate is displayed. Keep a note of the location. So next we need to create our Apache virtual host files. Create the following files.
/etc/apache2/sites-available/echo.f2hcloud.com.conf
Populate the file with the below code modifying the location to the SSL as displayed in the console.
nano /etc/apache2/sites-available/echo.f2hcloud.com.conf<VirtualHost *:80>
ServerName echo.f2hcloud.com
RewriteEngine On
RewriteCond %{SERVER_PORT} !^443$
RewriteRule (.*) https://%{HTTP_HOST}$1 [L]
RequestHeader set X-Forwarded-Proto "https"
</VirtualHost>
<VirtualHost *:443>
ServerName echo.f2hcloud.com
ErrorLog ${APACHE_LOG_DIR}/checkmk.error.log
CustomLog ${APACHE_LOG_DIR}/checkmk.access.log combined
SSLEngine on
SSLCertificateFile /etc/letsencrypt/live/echo.f2hcloud.com/fullchain.pem
SSLCertificateKeyFile /etc/letsencrypt/live/echo.f2hcloud.com/privkey.pem
SSLCertificateChainFile /etc/letsencrypt/live/echo.f2hcloud.com/chain.pem
Protocols h2 http/1.1
</VirtualHost>
/etc/apache2/conf-available/ssl-params.conf
Populate the file with the below code block.
nano /etc/apache2/conf-available/ssl-params.confSSLProtocol -all +TLSv1.3 +TLSv1.2
SSLOpenSSLConfCmd Curves X25519:secp521r1:secp384r1:prime256v1
SSLCipherSuite ECDHE-ECDSA-AES128-GCM-SHA256:ECDHE-RSA-AES128-GCM-SHA256:ECDHE-ECDSA-AES256-GCM-SHA384:ECDHE-RSA-AES256-GCM-SHA384:ECDHE-ECDSA-CHACHA20-POLY1305:ECDHE-RSA-CHACHA20-POLY1305:DHE-RSA-AES128-GCM-SHA256:DHE-RSA-AES256-GCM-SHA384
SSLHonorCipherOrder on
SSLSessionTickets off
SSLCompression off
SSLUseStapling On
SSLStaplingCache "shmcb:logs/ssl_stapling(32768)"
SSLStaplingResponseMaxAge 900Save and close the file. Now enable SSL, disable the default site and enable the configuration you just created above. Ensure you modify the echo.f2hcloud.com.conf section to reflect your Apache virtual host file.
a2enmod headers && a2enmod ssl && a2enmod http2 && a2dissite 000-default.conf && a2enconf ssl-params && a2ensite echo.f2hcloud.com.confFinally, restart Apache for the new configuration to take effect.
systemctl reload apache2You can now access your CheckMK Linux Server monitor via your domain name.
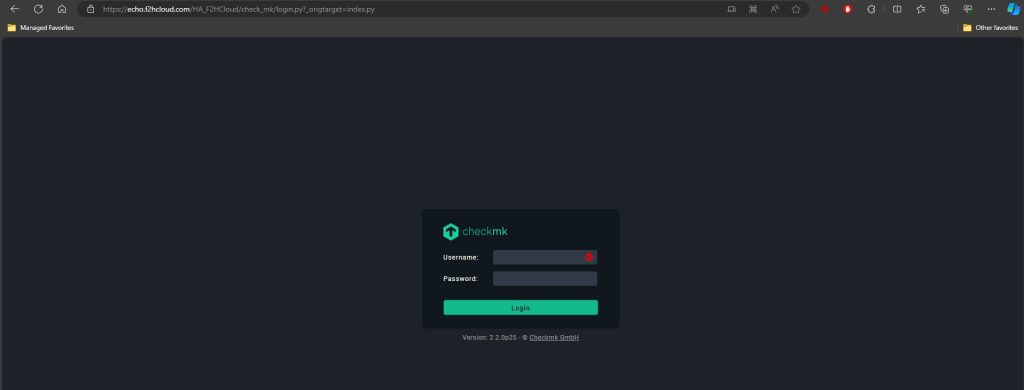
Configure CheckMK
In a basic form. CheckMK Server Monitor uses a lightweight agent that sits on a target server. The agent reports back information about the server to the CheckMK installation which, in turn, is displayed in the UI. You can use SNMP and other protocols but we’re just going to do the basics and install the agent on our servers. Login to your CheckMK install and navigate to Setup > Agents > Linux.
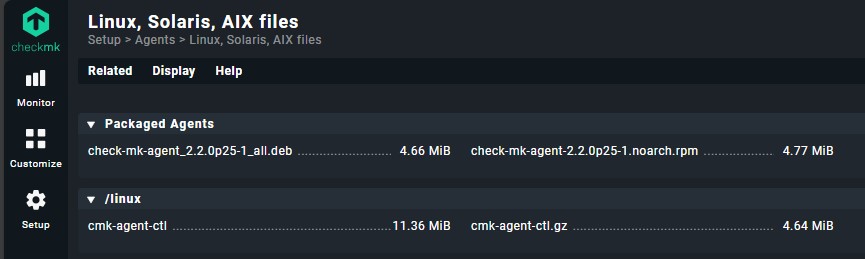
The agent at the top named check-mk-agent_2.2.-p25-1_all.deb is the default agent for Ubuntu and Debian. Right-click the agent and select “copy link”. Next, in a server that you want to start monitoring issue the below commands. Switch the URL for the URL from your CheckMK install.
wget https://xxx.f2hcloud.com/HA_F2HCloud/check_mk/agents/check-mk-agent_2.2.0p25-1_all.deb

apt install ./check-mk-agent_2.2.0p25-1_all.deb

sudo /var/lib/cmk-agent/scripts/cmk-agent-useradd.sh

sudo /var/lib/cmk-agent/scripts/super-server/setup trigger

ufw allow 6556 && ufw reload
If you see a 404 error when adding your server to the CheckMK host don’t worry. This is a bug. The server has been added to CheckMK.
You will be asked to confirm you want to connect to the host server. Select Y and then enter the password for your CheckMK install. The CheckMK agent is now installed on your Linux NVMe Server. Back in your CheckMK server, navigate to Setup > Hosts > Add Host. Enter the Hostname and the IP of the server you just installed the CheckMK agent on.
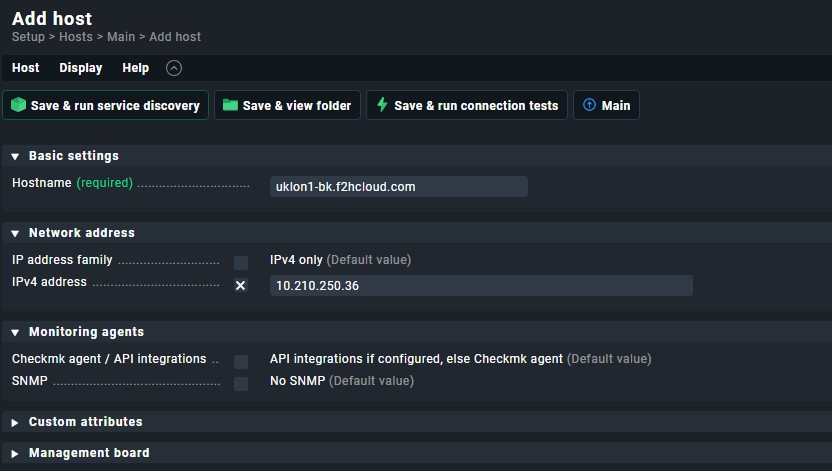
Click Save & run service discovery. Once CheckMk has discovered the running services on the server click Accept and finally, on the right click the yellow pending changes icon and accept the changes.
View Host Statistics
Now in the CheckMK dashboard, you should see the server(s) you have added. That’s the basic install of CheckMK Linux Server Monitoring on an Ubuntu VPS server. In the dashboard, you can create different types of graphical statistics for your servers.