

Load Balance MySQL Connections With HAProxy

Recently, we went through the process of load-balancing HTTPS connections with HAProxy. In this article, we are going to Load Balance HAProxy MySQL connections over our High Availability MySQL Cluster. Just to recap. We have already installed the following on our cluster;
- Installed 5 Servers with Ubuntu 22, MySQL 8, PHP 7.4 and Nginx
- We have configured MySQL Master-Master replication on each instance
- We have installed a Cloudflare origin certificate on each instance in the cluster
- Set up HAProxy to load balance over HTTPS
- Load Balance MySQL Connection With HAProxy (This Article)
At the moment, we can see we are load-balancing HTTPS connections by visiting https://dgb-ha.dev.gb.net/. Now we want to capture MySQL connections hitting our load balancer. We just need to make some minor changes.
Create MySQL Users
MySQL Strict Mode: To run some of these commands you may need to disable MySQL Strict mode.
We need to add two users to our MySQL cluster. These users will be used by HAProxy for health checks and so HAProxy can access our HAPropxy MySQL cluster. The latter must be a root user. So, if you have followed our guides we specifically left MySQL root logins enabled. Some people will want to use the root account. Others will want to create a user with root privileges. The latter is the most secure. If you choose this option, you can disable root logins on the cluster.
Create Health Check User
On one of the instances in the MySQL cluster. Add a new user for the health checks. You will want to change the haproxy_healthcheck for your user. This user will be created on all hosts. You can restrict the user to your HAProxy IP address.
mysql -u root -p
CREATE USER haproxy_healthcheck@haproxy_ip IDENTIFIED WITH 'mysql_native_password';
FLUSH PRIVILEGES;"
Create Root User
So now we are going to create a user with root privileges and disable root logins. To do this issue the below command replaces the values proxy_user and password. Again, this user will be created on all hosts.
mysql -u root -p

CREATE USER 'proxy_user'@'%' IDENTIFIED BY 'PASSWORD';
GRANT ALL PRIVILEGES ON *.* TO 'proxy_user'@'%' WITH GRANT OPTION;
FLUSH PRIVILEGES;
Take Snapshot
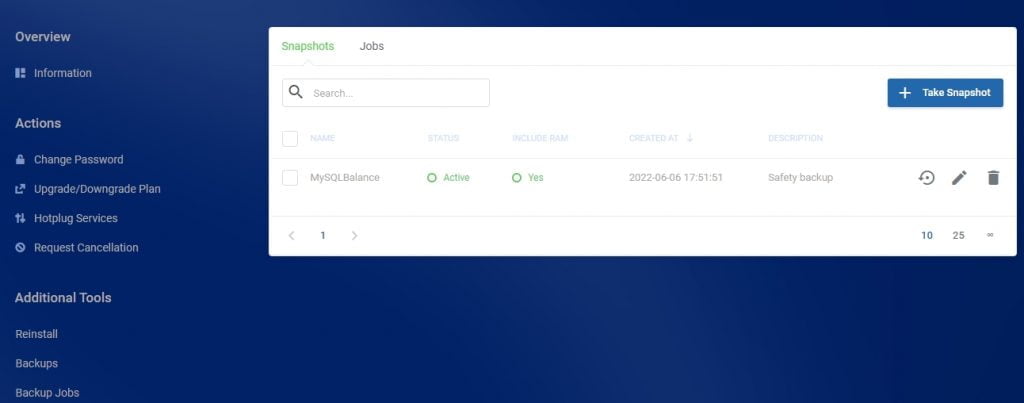
Before you continue, take a snapshot of your HAProxy server. So If something goes wrong, you do not want to start from scratch. A snapshot can be taken from the Discovery control panel. You can instantly back up your work and restore it if required. But remember, you can order additional services like Snapshots, Ram and HDDs. These are free so long as they are cancelled by midnight the same day.
Load Balance HAProxy MySQL Connections
So, for HAProxy to deal with MySQL connections we must install the MySQL Client on our HAProxy server. Install the MySQL client with the following command.
apt install mysql-client -yNow we are ready to configure HAProxy for MySQL connections. We have already configured HAProxy to work over HTTPS so we already have our configuration in place. So, in the /etc/haproxy/haproxy.cfg file, add a new listening block for MySQL.
nano /etc/haproxy/haproxy.cfg

listen mysql-cluster
    bind :3306
    mode tcp
    timeout connect 5000
    timeout check 5000
    timeout client 30000
    timeout server 30000
    option mysql-check user monitor
    balance roundrobin
    server S1FR-mysql xxx.xx.xx.xx:3306 check
    server S2UK-mysql xxx.xx.xx.xx:3306 check
    server S3DE-mysql xxx.xx.xx.xx:3306 check
    server S4CA-mysql xxx.xx.xx.xx:3306 check
    server S5USAW-mysql xxx.xx.xx.xx:3306 check
IMPORTANT. Do not bind the MySQL port to the local IP or internal IP. Just use :3306. Here we are using a round-robin configuration. We have specified the monitor user we created in the step above and our MySQL cluster. Save and close the file. Restart Haproxy.
systemctl restart haproxySo now when we check our statistics page we should see our MySQL cluster online and responding to requests on port 3306.
Confirm MySQL Cluster Health
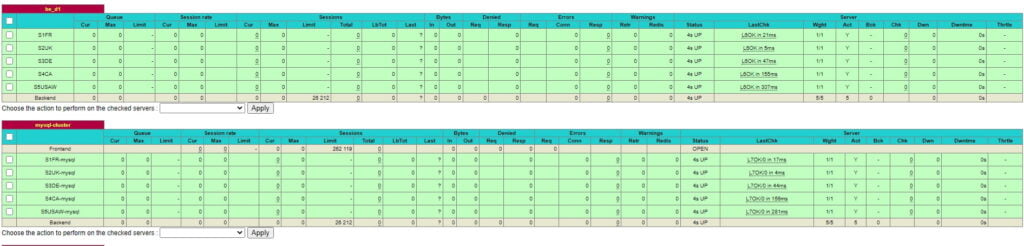
Great. Our HAProxy load balancer is now dealing with secure connections on port 443 using a Cloudflare Origin certificate. And, we are now load balancing MySQL connections over our high availability MySQL cluster. But, let’s confirm everything is working as expected. We created a root user in the previous steps. Let’s use that user to test our load balancer.
mysql -h 127.0.0.1 -u cluster_root -p -e "show variables like 'server_id'"Our output looks like this.
dev@dgb-ha:~# mysql -h 127.0.0.1 -u cluster_root -p -e "show variables like 'server_id'"
Enter password:
+---------------+-------+
| Variable_name | Value |
+---------------+-------+
| server_id     | 1     |
+---------------+-------+
dev@dgb-ha:~# mysql -h 127.0.0.1 -u cluster_root -p -e "show variables like 'server_id'"
Enter password:
+---------------+-------+
| Variable_name | Value |
+---------------+-------+
| server_id     | 2     |
+---------------+-------+
dev@dgb-ha:~# mysql -h 127.0.0.1 -u cluster_root -p -e "show variables like 'server_id'"
Enter password:
+---------------+-------+
| Variable_name | Value |
+---------------+-------+
| server_id     | 3     |
+---------------+-------+
dev@dgb-ha:~# mysql -h 127.0.0.1 -u cluster_root -p -e "show variables like 'server_id'"
Enter password:
+---------------+-------+
| Variable_name | Value |
+---------------+-------+
| server_id     | 4     |
+---------------+-------+
dev@dgb-ha:~# mysql -h 127.0.0.1 -u cluster_root -p -e "show variables like 'server_id'"
Enter password:
+---------------+-------+
| Variable_name | Value |
+---------------+-------+
| server_id     | 5     |
+---------------+-------+
We have 5 servers in our HAProxy MySQL cluster and made 5 connections via HAProxy. We connected to each MySQL server. But we can further confirm things are working with TELNET. In an SSH console, we can query our MySQL port on our load balancer. This should then route the connection to a server in the cluster.
telnet xxx.xx.xx.xx 3306
Trying xxx.xx.xx.xx...
Connected to xxx.xx.xx.xx.
Escape character is '^]'.
[
And checking our statistics we can see the connection hit our MySQL server in France.
